Instructions on installing the new Eclipse (M2E) connector for the JiBX Maven Plugin.
NOTE: The JiBX m2e extension currently only covers the basic integration. We will be adding more functionality, such as automatic discovery and automatic project addition of generated source code. (If you know how to do this, we welcome your contributions!)
Step 1: From the eclipse menu, select 'Help' -> 'Install New Software...', then click 'Add' to add a new update site:

The JiBX eclipse plugins update site is located at http://jibx.sourceforge.net/eclipse/
Step 2: To install the m2e connector for JiBX, select it on the update screen:

Click okay when you get the message that the code is not signed, agree to the license message, then restart eclipse.
Step 3: The lifecycle extensions will be automatically added to any project that uses the JiBX maven plugin. You will need to manually add the generated-source folder to the project source folders. Right click on your project in the package explorer, then select 'properties'. From the properties screen, Select 'Java Build Path' from the left selector. Select the 'Source' tab and click on the 'Add Folder' button:

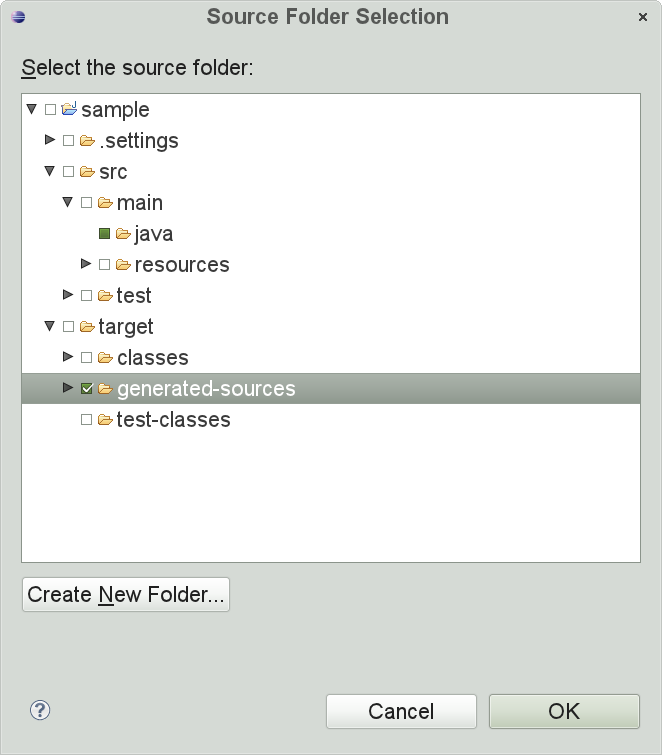
Step 4: Expand the folder tree and select the 'generated-sources' folder in the maven 'target' folder.

Click 'OK' and that should do it!